How to connect Instagram and Facebook, step by step
The complete roadmap from a new Instagram account to your first scheduled post, with pictures and a short video.
Video walkthrough, 1 min 19 s, no sound. Download the video.
What you need before you start
Part 1 · Prepare your accounts (once)
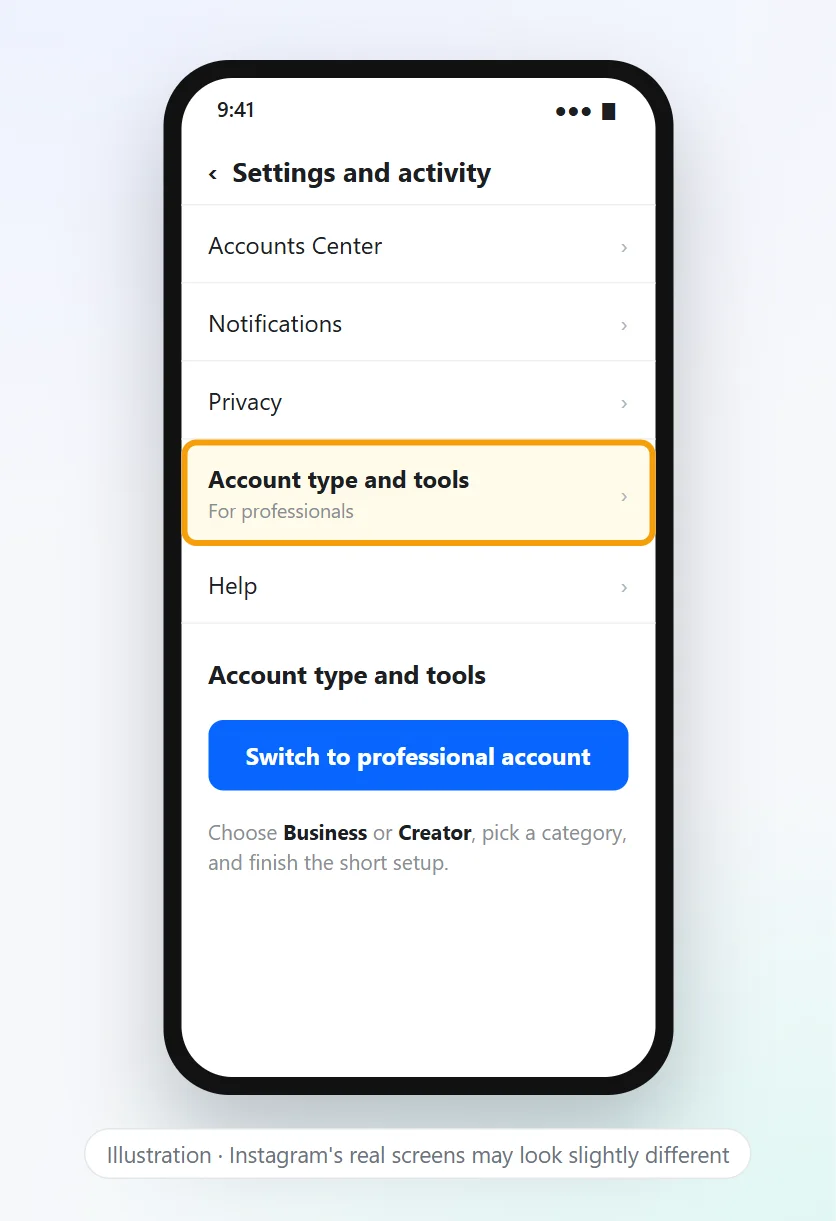
1Make Instagram a professional account
Meta only lets apps publish to professional Instagram accounts (Business or Creator). Switching is free, and you can switch back later.
- Open the Instagram app and go to your profile.
- Tap the ☰ menu, then Settings and activity.
- Tap Account type and tools → Switch to professional account.
- Choose Business (recommended for shops and brands) or Creator, pick a category and finish the setup.
2Link Instagram to your Facebook Page
Meta publishes to Instagram through the Facebook Page it's linked to, so the two must be linked.
- On a computer, open Facebook and switch into your business Page (click your profile picture → choose the Page).
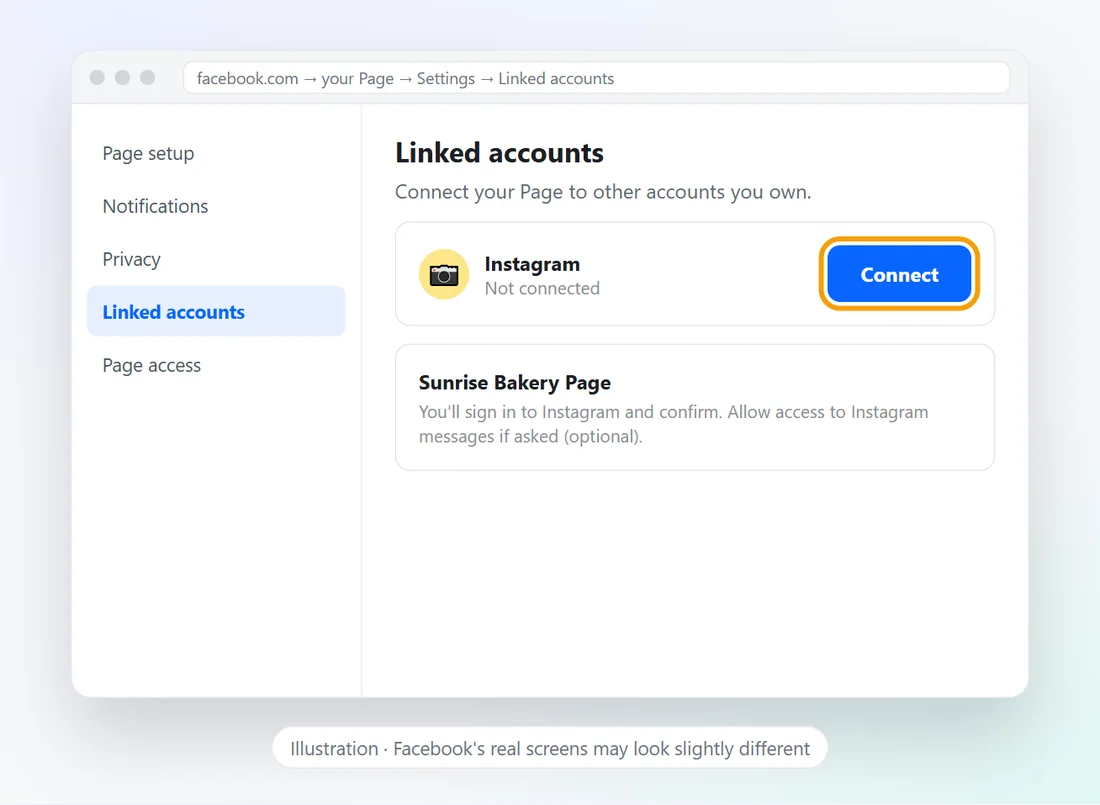
- Go to Settings → Linked accounts → Instagram.
- Click Connect and sign in to the Instagram account from step 1. Allowing access to messages is optional.
You can also do this in Meta Business Suite → Settings → Instagram accounts, or from the Instagram app under Accounts Center.
Part 2 · Start the connection
3Sign in to Wavely
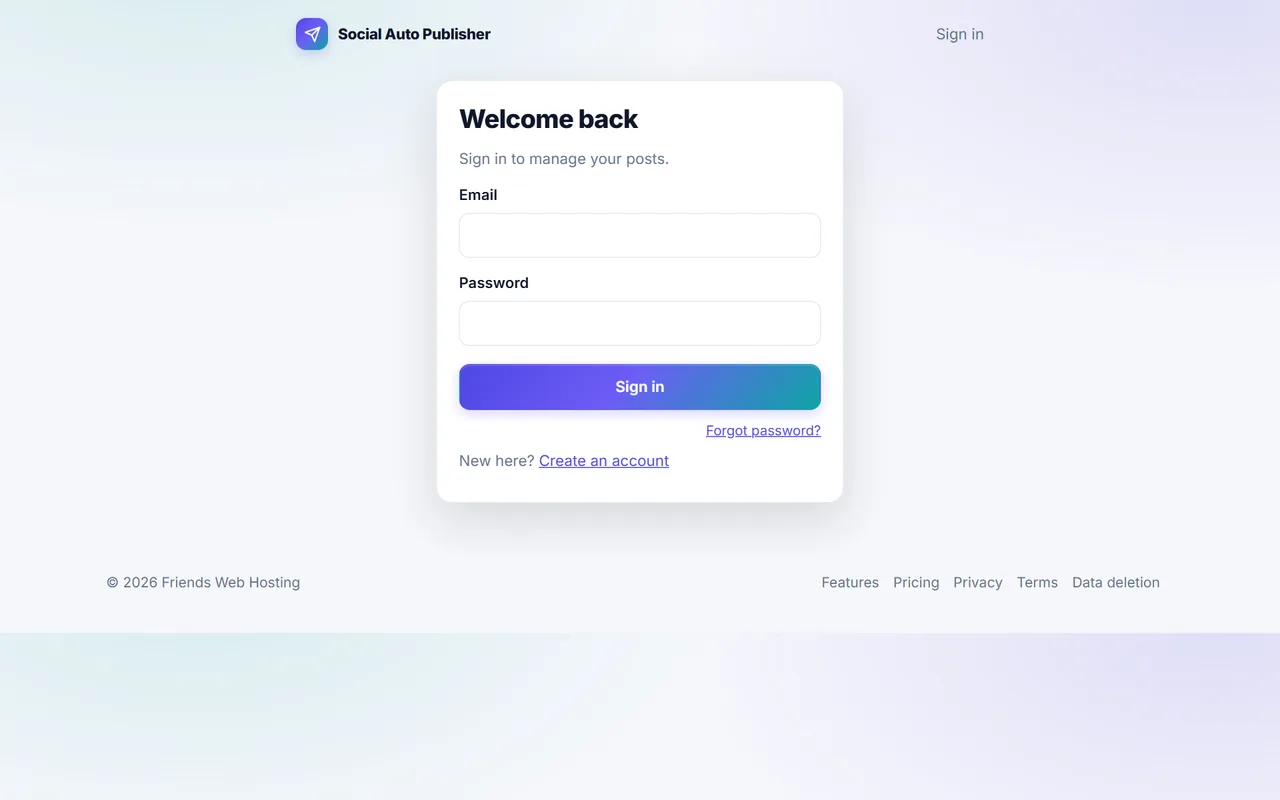
Open the website and sign in. New here? Click Start free to create your account first: the free plan needs no card.
4Social accounts → Connect Instagram
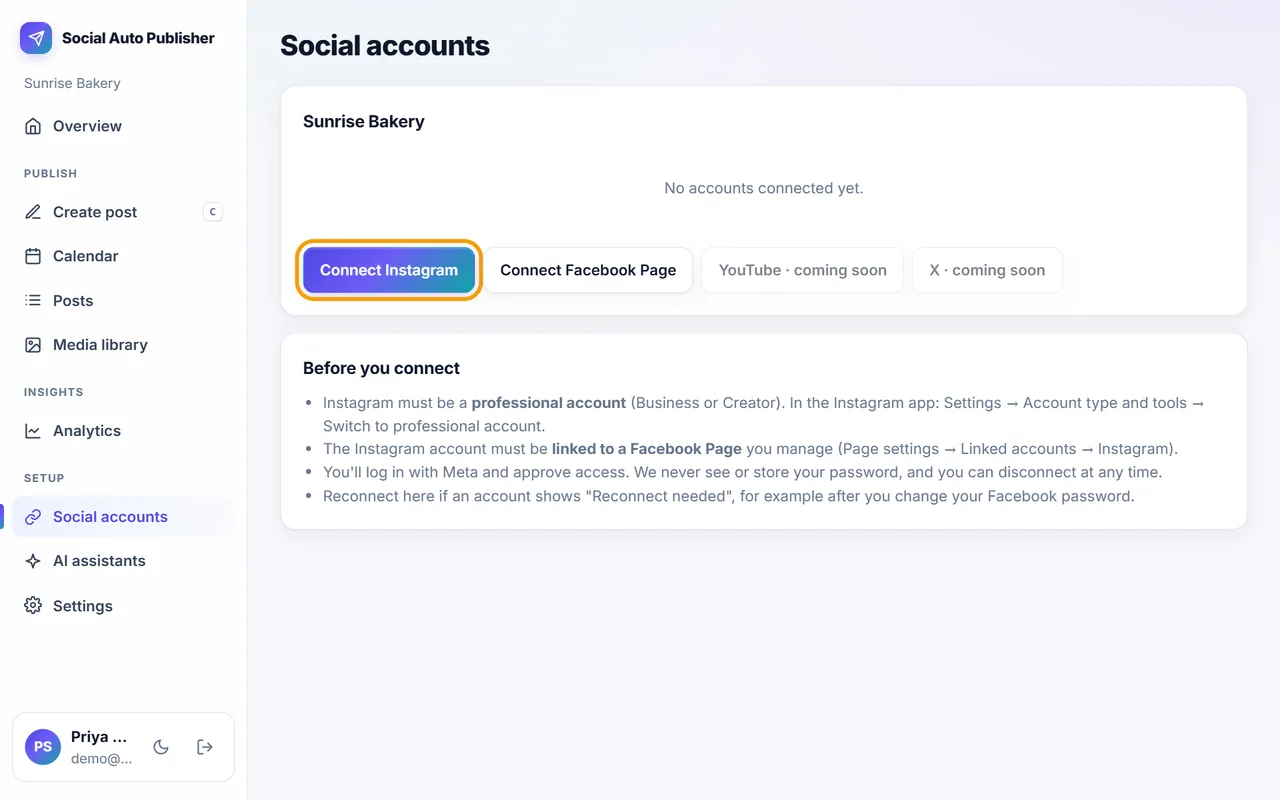
In the left menu choose Social accounts, then click Connect Instagram. You're taken to Meta's own sign-in page.
Connect Instagram and Connect Facebook Page open the same Meta screens. Use either one: you choose the exact Pages and Instagram accounts in the next steps.
Part 3 · Approve access on Meta's screens
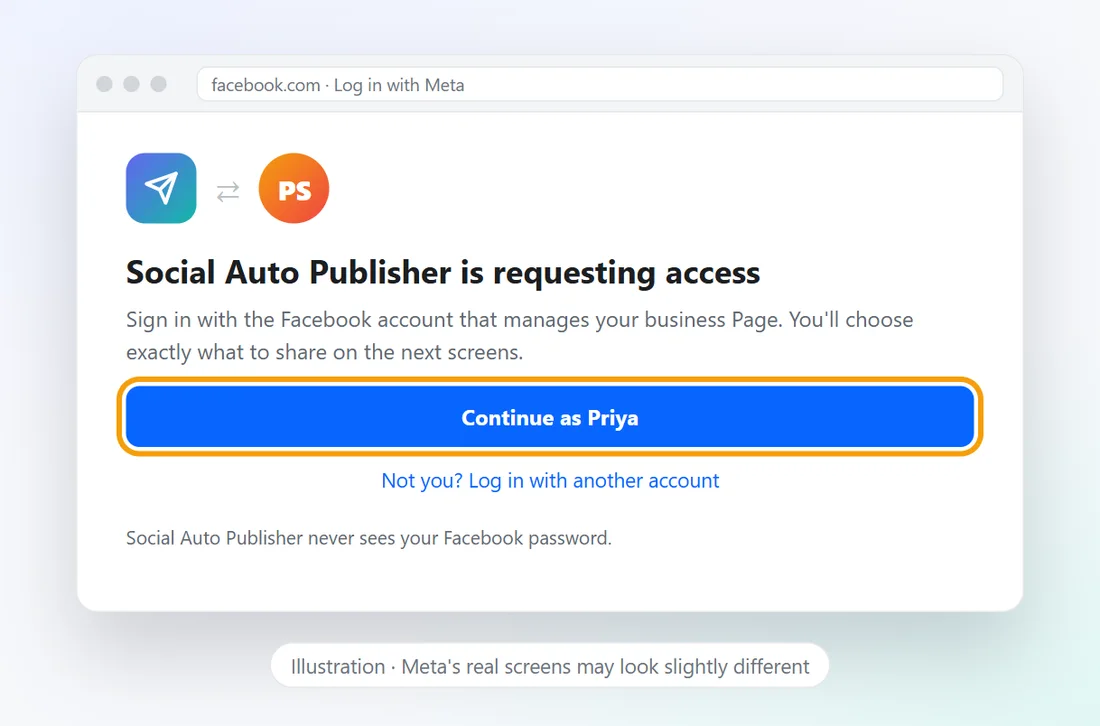
5Continue with Meta
Meta shows which app is asking and which Facebook profile you're signed in as. Check it's the profile that manages your business Page, then click Continue as ….
Signed in as the wrong person? Click Not you? and log in with the right Facebook account. Your password goes only to Meta.
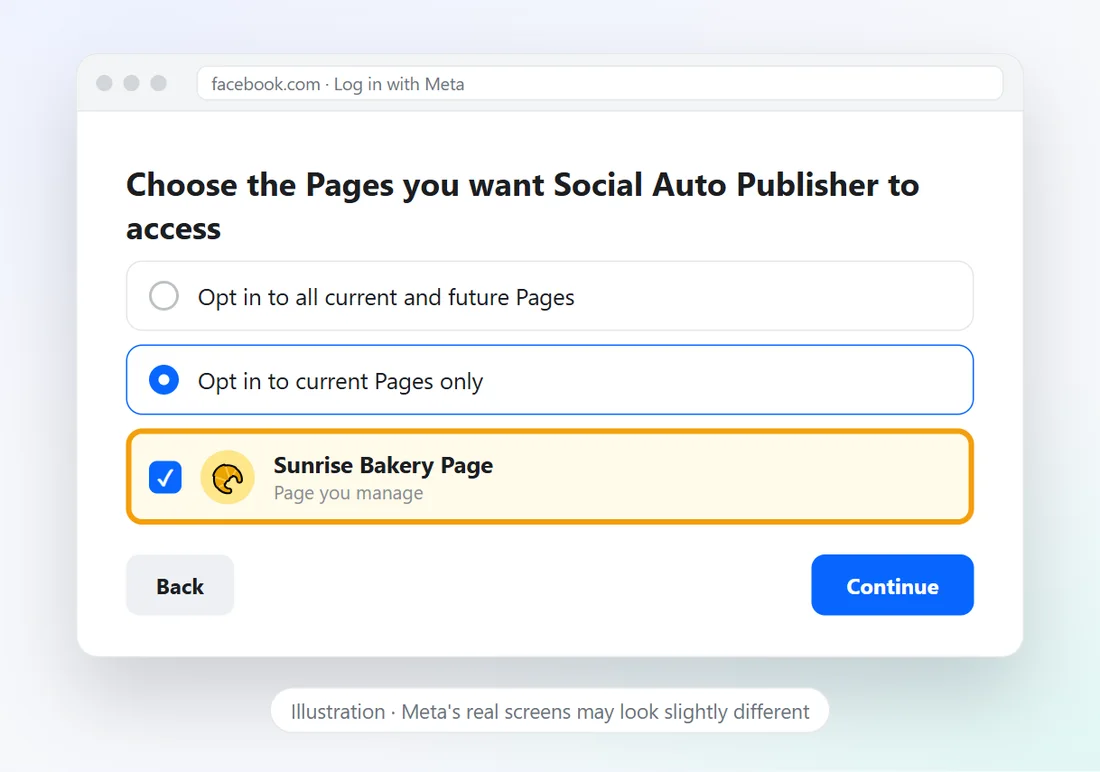
6Choose your Facebook Page
Tick the Page your Instagram account is linked to, plus any other Page you want to post to. Then click Continue.
"Opt in to current Pages only" is fine. Pick "all current and future Pages" if you want new Pages to be available without reconnecting.
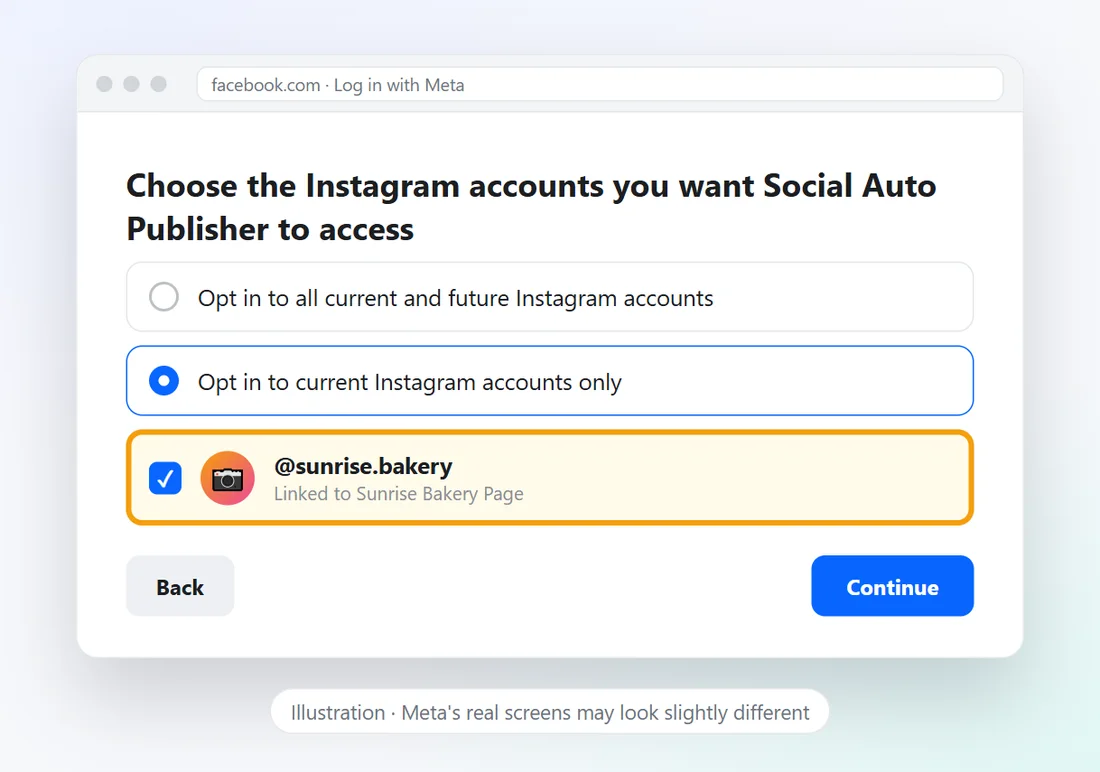
7Choose your Instagram account
Tick your Instagram account and click Continue. Only Business or Creator accounts linked to the Pages you chose in step 6 are listed.
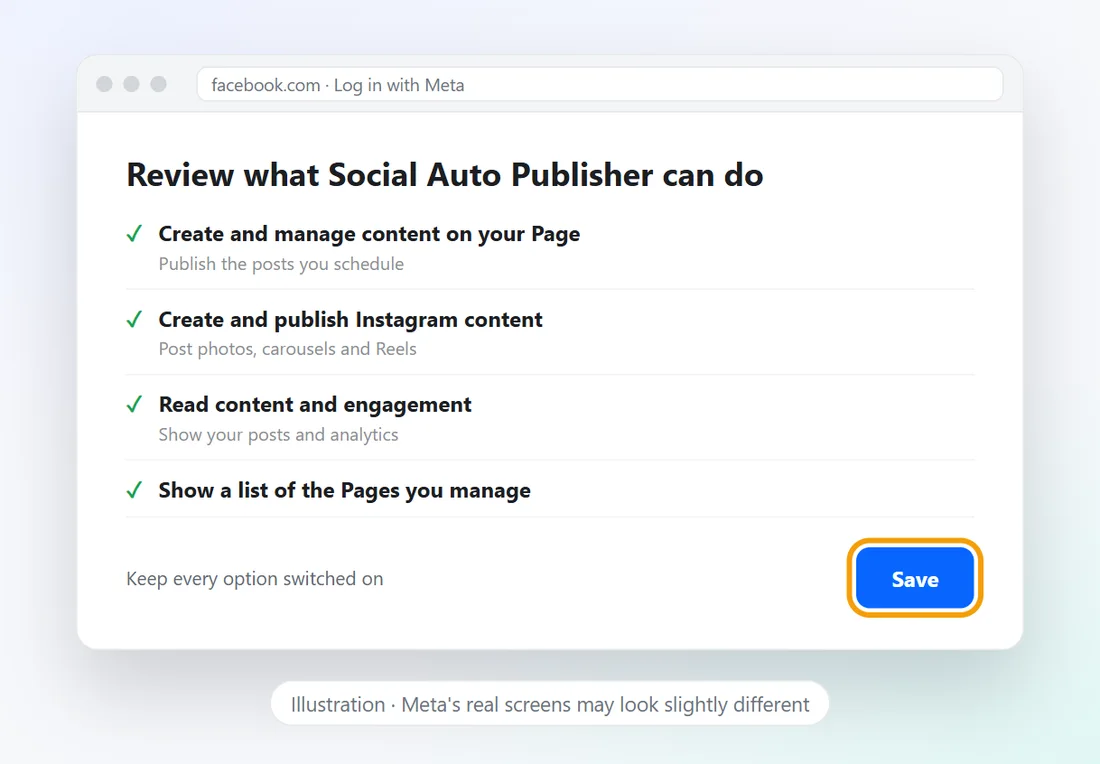
8Review the permissions and Save
Meta lists what Wavely may do: publish to your Page and Instagram, show your Pages, and read posts and engagement for analytics. Leave every switch on and click Save. Switching one off stops posting or analytics for that account.
Meta then confirms the link. Click Got it and you're sent back to Wavely automatically.
Part 4 · Check and start posting
9Check that both accounts are Ready to publish
The Accounts connected page lists each Facebook Page and Instagram account with ready to publish. Your posts from the last 30 days are imported in the background and appear in Posts, Calendar and Analytics within a minute, tagged Manual.
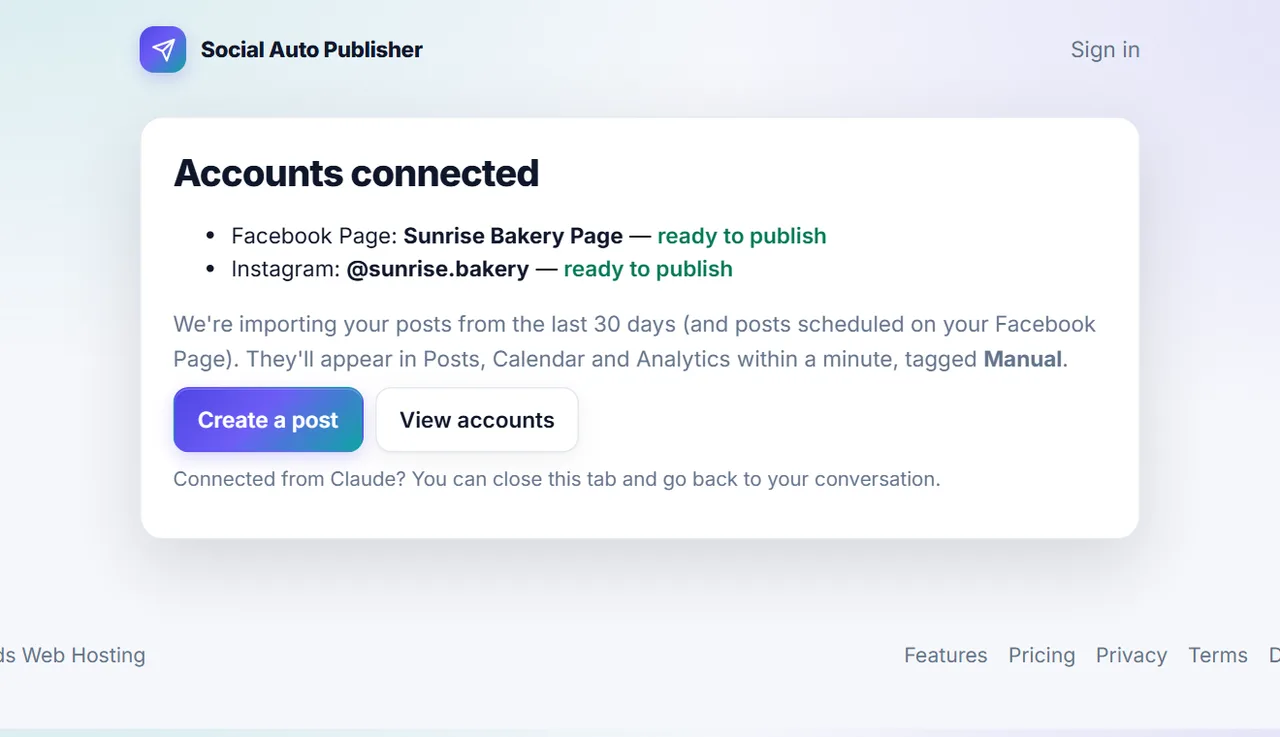
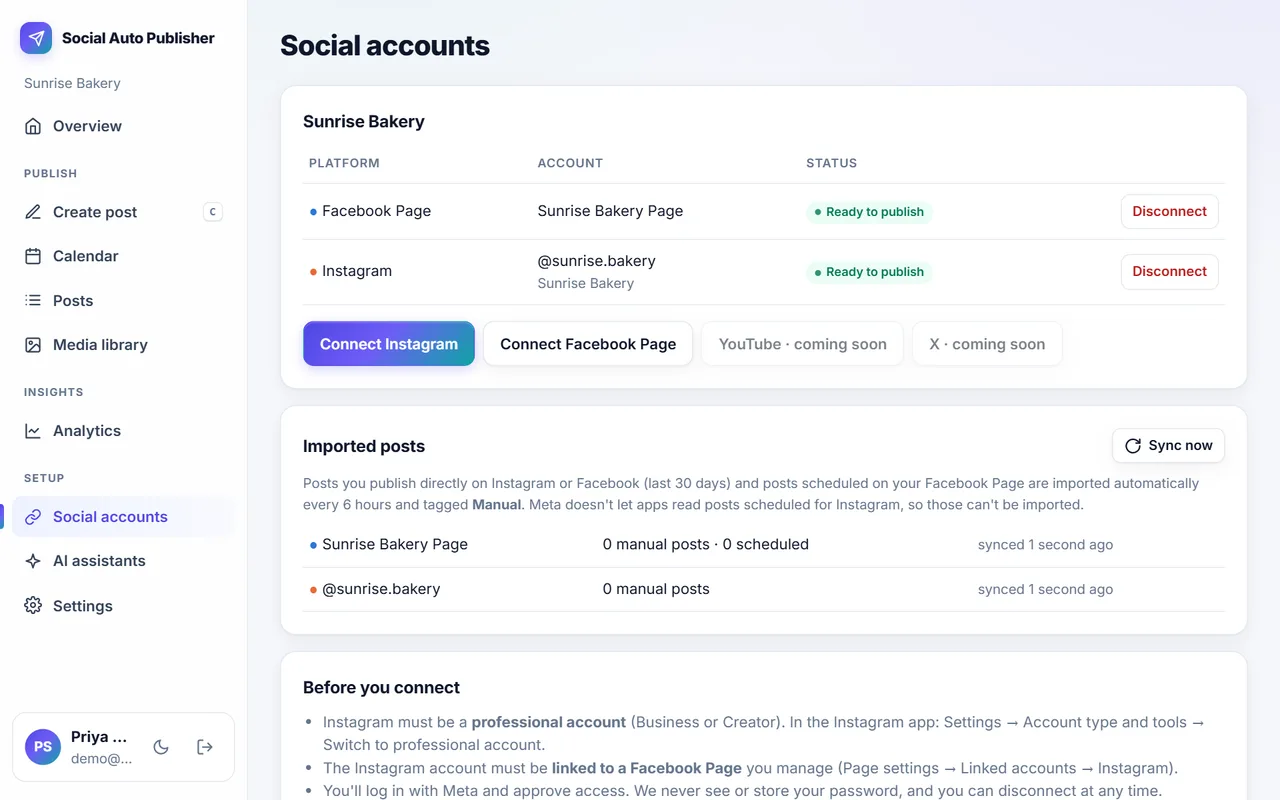
You can always check again under Social accounts. A green Ready to publish badge means everything works.
10Create your first post
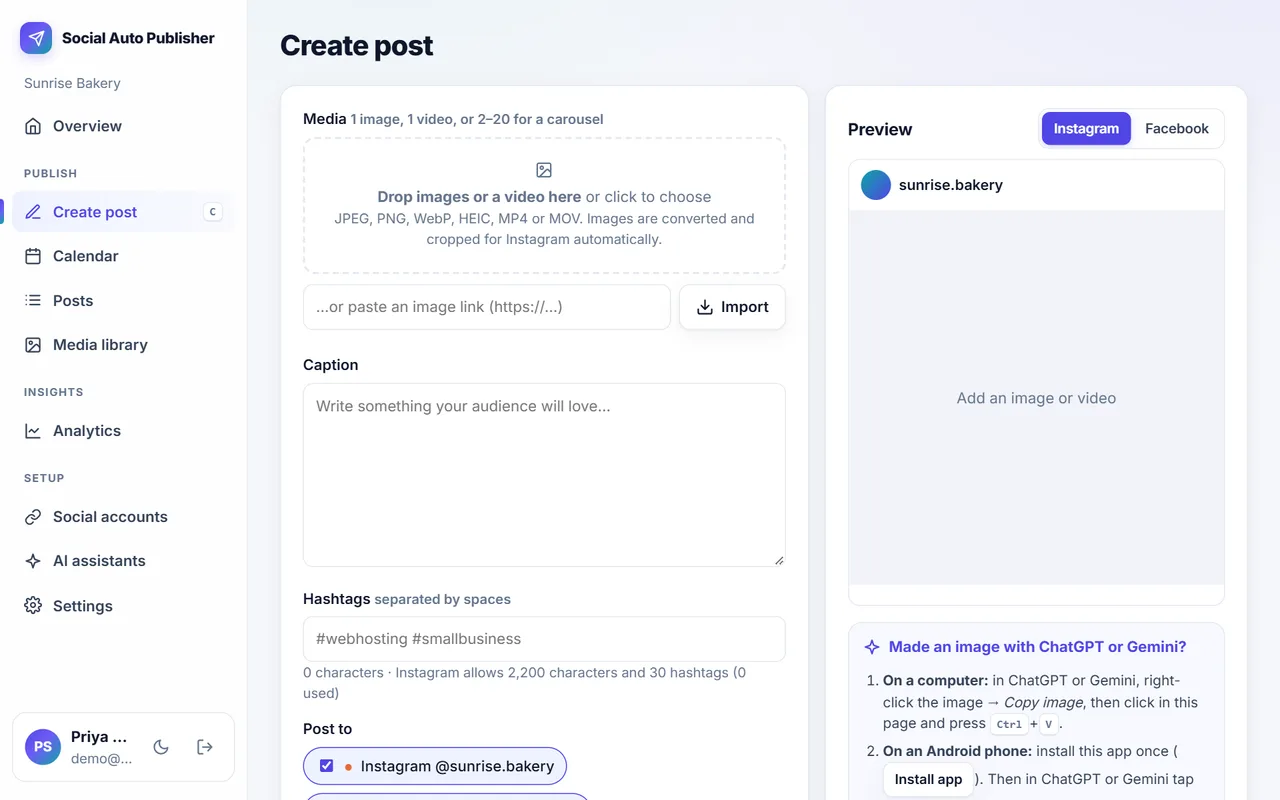
- Click Create post in the menu.
- Add an image or video (upload, paste, drag in, or pick from the Media library), write your caption and hashtags.
- Tick Instagram and your Facebook Page, check the preview, then choose Publish now or pick a date and time to schedule it.
?Troubleshooting
| What you see | What to do |
|---|---|
| "No Instagram professional account was found" | Make Instagram a Business or Creator account (step 1), link it to the Page (step 2), then reconnect and tick both the Page and the Instagram account (steps 6–7). |
| "No Facebook Pages were shared" | Reconnect and tick at least one Page in step 6. |
| An account shows "Can't publish" or "needs …" | A permission was switched off in step 8. Click Connect Instagram again and leave every permission on. |
| An account shows "Reconnect needed" | Meta ended the sign-in, for example after a Facebook password change or after removing the app in Facebook settings. Click Connect Instagram and approve again; your posts and schedule are kept. |
| My Page or Instagram isn't listed on Meta's screens | Your Facebook profile needs full control of the Page (Page settings → Page access). If someone else owns the Page, ask them to give you access first. |
| Meta says the app isn't available, or shows an error before the Page list | Wavely is in early access while Meta reviews the app, so Meta only allows invited accounts. Write to karlapati.hemanth@gmail.com and we'll add you. |
| "Connection cancelled" | You closed Meta's screens or clicked Cancel. Start again from Social accounts; nothing was changed. |
| "This connection link has expired" | Connection links last 15 minutes. Go back to Social accounts and click Connect again. |
| Analytics show no reach, views or saves | These need the insights permissions on Meta's review screen. Reconnect and leave every permission on. New accounts can take up to 48 hours to show insights. |
Still stuck? Write to karlapati.hemanth@gmail.com with a screenshot of the message, and never include your password.
iPrivacy and disconnecting
- You sign in on Meta's own pages. Wavely never sees or stores your Facebook or Instagram password.
- We store only the access Meta grants, encrypted, and use it to publish what you schedule and to show your analytics.
- To disconnect, go to Social accounts and click Disconnect. Scheduled posts for that account go back to drafts. You can also remove the app on Facebook under Settings & privacy → Settings → Business integrations.
- Read our privacy policy and how to delete your data.
Instagram and Facebook connection: frequently asked questions
Do I need an Instagram business account to schedule posts?
You need a professional account: Business or Creator. Switching is free in the Instagram app under Settings → Account type and tools.
Why must Instagram be linked to a Facebook Page?
Meta's publishing API reaches Instagram professional accounts through a linked Facebook Page, so the link is required for automatic publishing.
Can I connect more than one Instagram account?
Yes. Each Instagram account needs its own linked Facebook Page. Your plan sets how many channels you can connect.
Try it with next week's posts
The free plan needs no card. Set up takes about ten minutes.
Create your free account